PocketHunter - Devlog #7: Backpack UI
I’m back from another stint of busy days from my day job.
Game UI Always Scared Me
I’ve been dreading UI since starting my game dev journey. Over the years I’ve watched tutorials for various game engines and coded up basic game functionality but I have always stopped short of beginning to work on UI because I found the manner in which UI is implemented in most engines to be counterintuitive. It always seemed like you’d be stuck wrangling clunky half-dynamic elements to try and create even basic UI components. DragonRuby appeared to fall into this same trap at first. I was running circles in my brain thinking how I would calculate and create this dynamic backpack UI and testing bits of code when I finally stumbled onto args.layout.
DragonRuby Grid Layout
I should have read the docs more sooner! DragonRuby comes with a grid system built in, something my inner web-dev was very excited about. Now, don’t get me wrong, I’ve worked with CSS Grid systems for over a decade so I know first-hand how often you still need to stray from that set grid to create more custom components and positioning. But for now, this was all I needed to get myself started in game UI once and for all.
DragonRuby’s grid is simple: 12 rows and 24 columns. Rendering something to the grid is also simple:
args.layout.rect(row: 2, col: 8, w: 8, h: 8).merge(WHITE)You set the row and column to start the rect’s render, then set how wide and how high the rect should be. w and h are the number of grid rows/columns to extend the rect to. The above example draws a square thats 8 columns wide by 8 columns high, and it draws it starting at row 2 column 8 of the grid. This creates a pretty well centered square in my game screen.
Now that we have a basic understanding of DragonRuby’s grid I can show you the remainder of the code I used to draw my backpack UI:
if start_row == row_i && start_col == col_i
    args.outputs.borders << args.layout.rect(row: starting_row, col: starting_col, w: 2, h: 2).merge(RED)
else
    args.outputs.borders << args.layout.rect(row: starting_row, col: starting_col, w: 2, h: 2).merge(BLUE)
end

args.outputs.labels << args.layout.rect(row: starting_row, col: starting_col, w: 2, h: 2).center.merge(text: "R: #{row_i} C: #{col_i}", vertical_alignment_enum: 1, alignment_enum: 1)
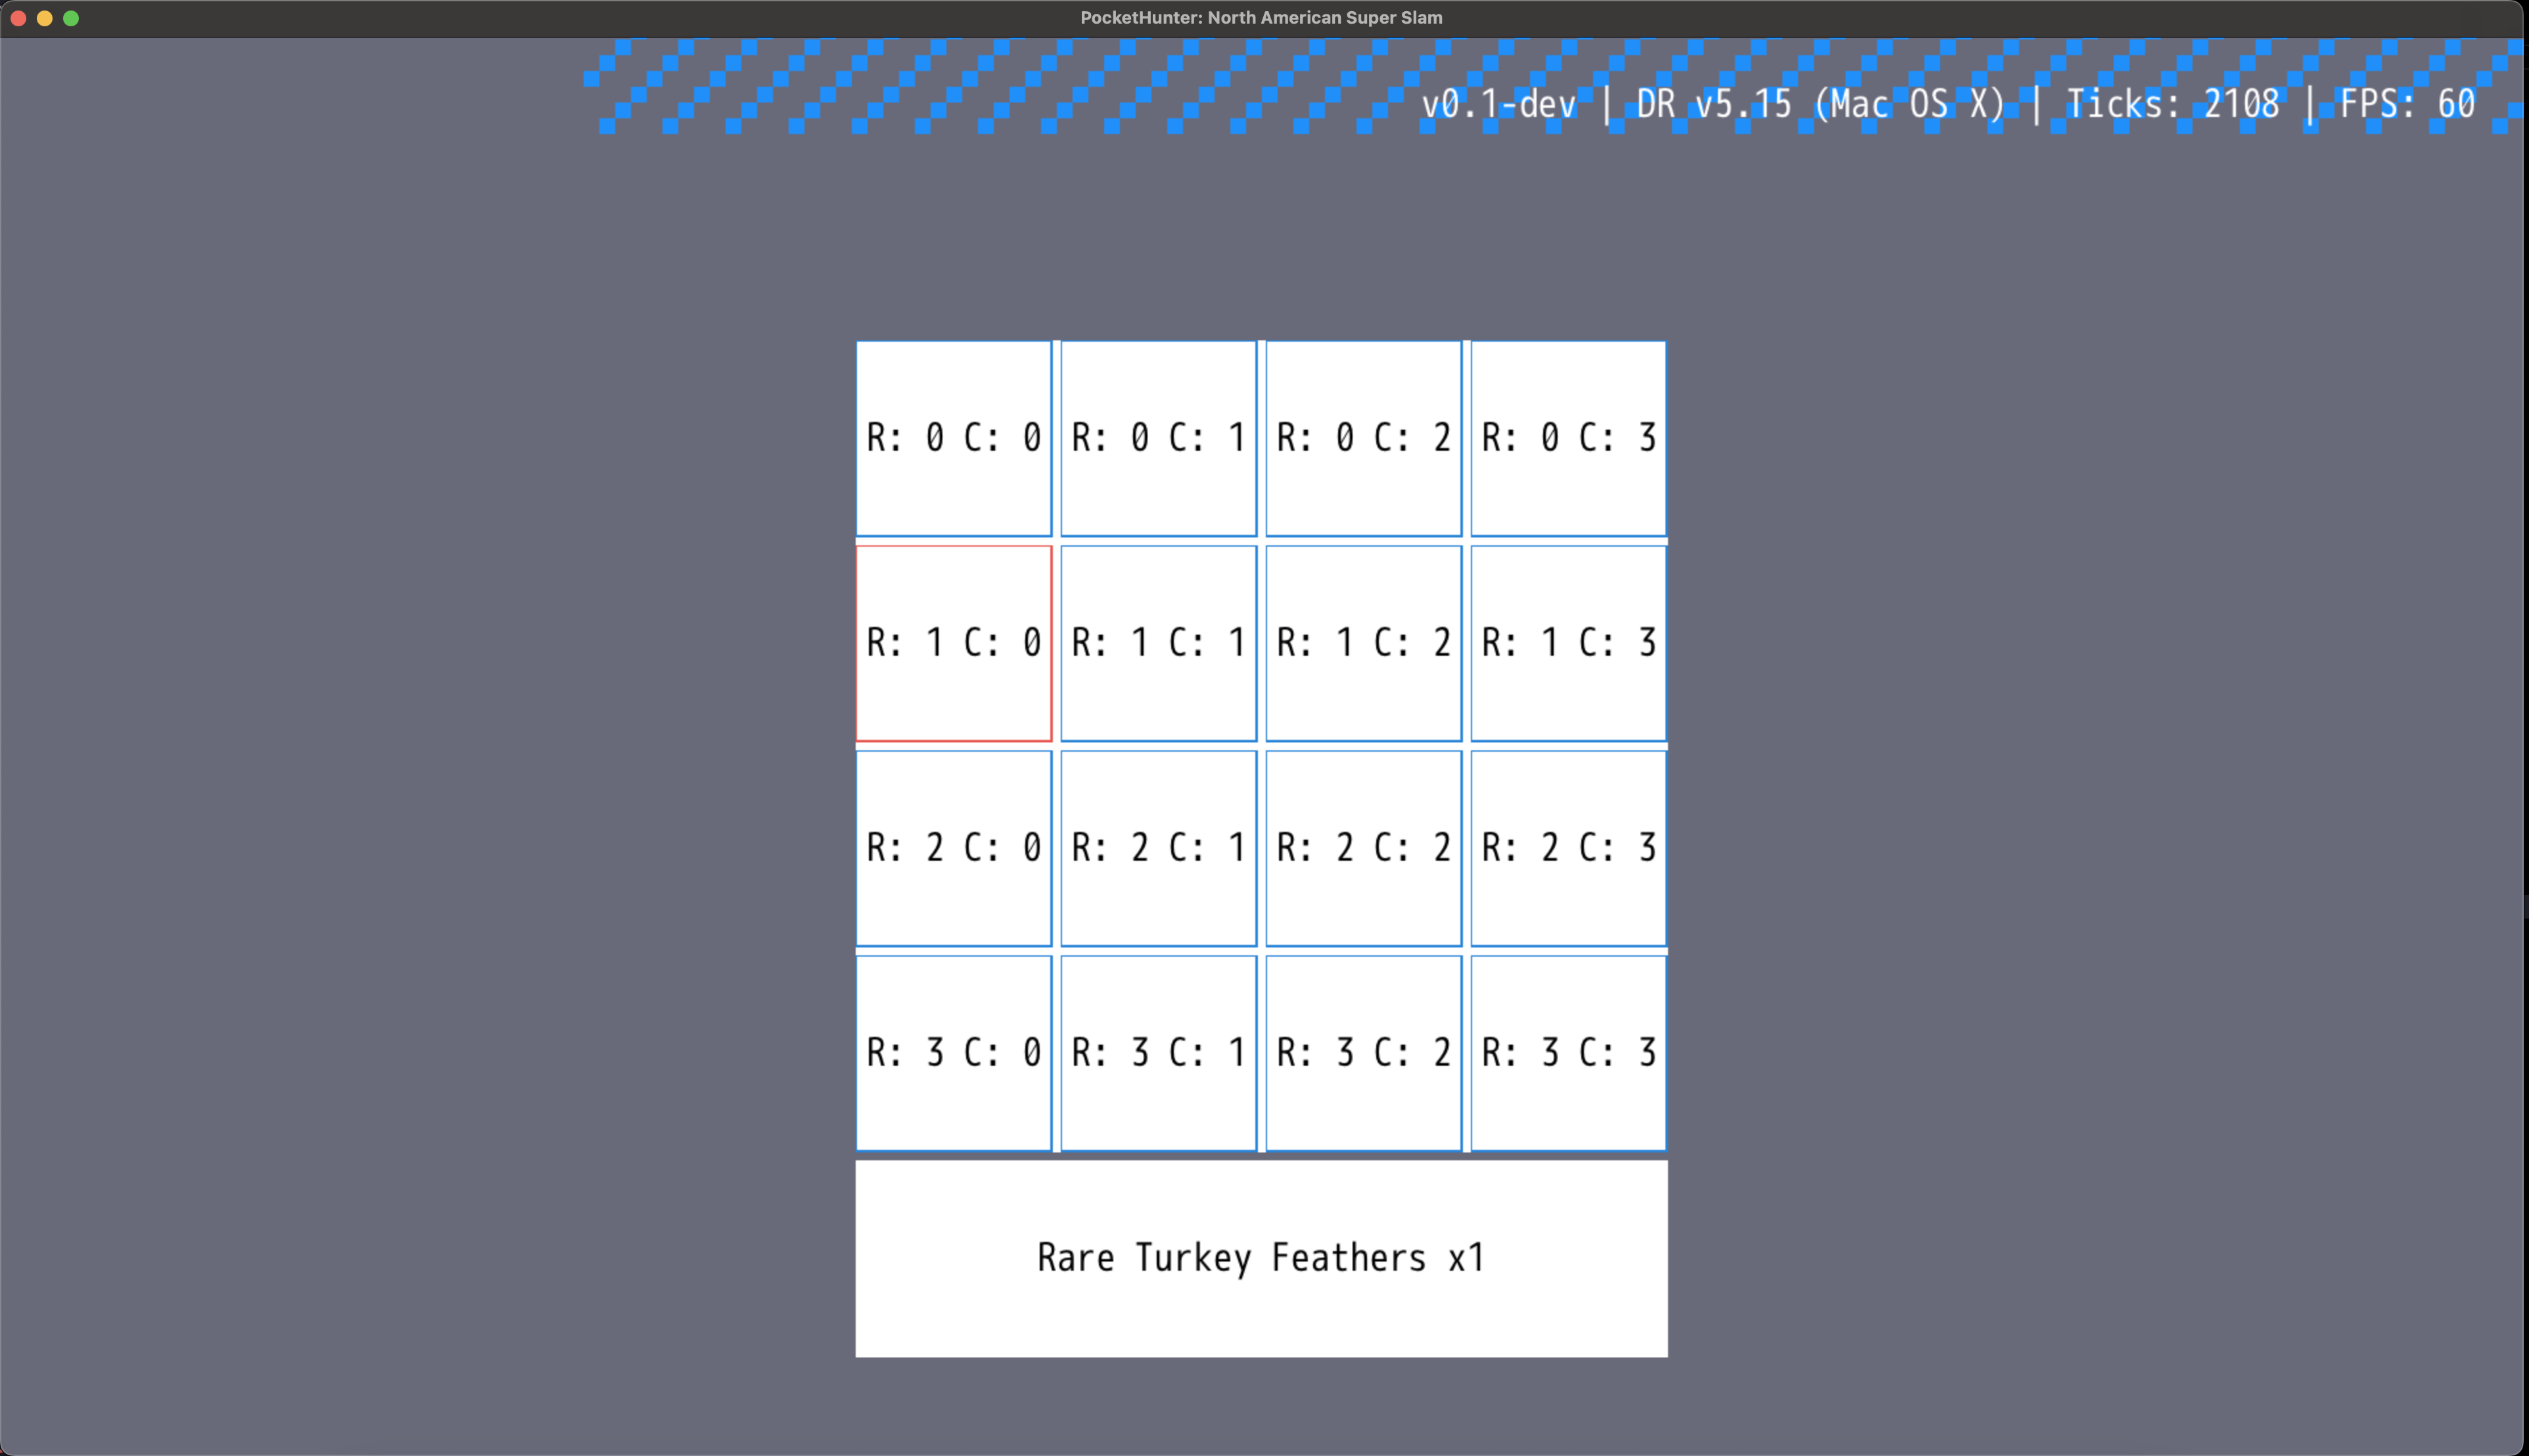
The code above draws a square colored border for each item slot in the backpack; blue by default and red if the slot is currently selected by the user. It then draws a label within the slot to display the text of the item. For now it is only displaying the row and column index for visibility and learning.
Next, I decided to add a rectangle to the bottom of the main backpack square to display the name, rarity, and quantity of the item that was currently selected by
the user:
selected_item = pack_array[start_row][start_col]
args.outputs.primitives << args.layout.rect(row: 10, col: 8, w: 8, h: 2).merge(WHITE).merge(primitive_marker: :solid)
args.outputs.labels << args.layout.rect(row: 10, col: 8, w: 8, h: 2).center.merge(text: "#{selected_item[:level]} #{selected_item[:name]} x#{selected_item[:quantity]}", vertical_alignment_enum: 1, alignment_enum: 1)
In no-time I had a usable backpack UI wireframe to allow me to continue building functionality for my game, all thanks to DragonRuby’s easy to use layout APIs.
Quick Note
It took me longer than I’d like to figure out the best way to handle rendering the backpack and navigating it. As is the case with most things in my game dev journey it took trial and error and then a quick realization of the answer which had been starring me in the face the entire time. keyup is your friend when you need to watch for buttons to be pressed but want to ensure you only trigger code once on the frame where that button interaction happened.
UI, dragonruby, gamedev — Feb 6, 2024