PocketHunter - Devlog #1.1: Tiles & Cameras, Oh My!
Two updates in one day? Must be an exciting process!
I decided now that I’ve coded up the core encounter logic and in doing so feel more comfortable with the way the engine works, why not try my hand at rendering some image based tiles rather than the simple colored rectangles I was using for the initial POC. To do this I decided to use LDtk. If you’re not familiar with it, LDtk is a “Modern 2D level editor from the Director of Dead Cells“. I downloaded LDtk quite some time ago and hadn’t yet had a chance to open and use it for something. Now was my chance.
I started with a very simple image. Just some green tiles around the border and a small blue shaded tile area for the encounter trigger.
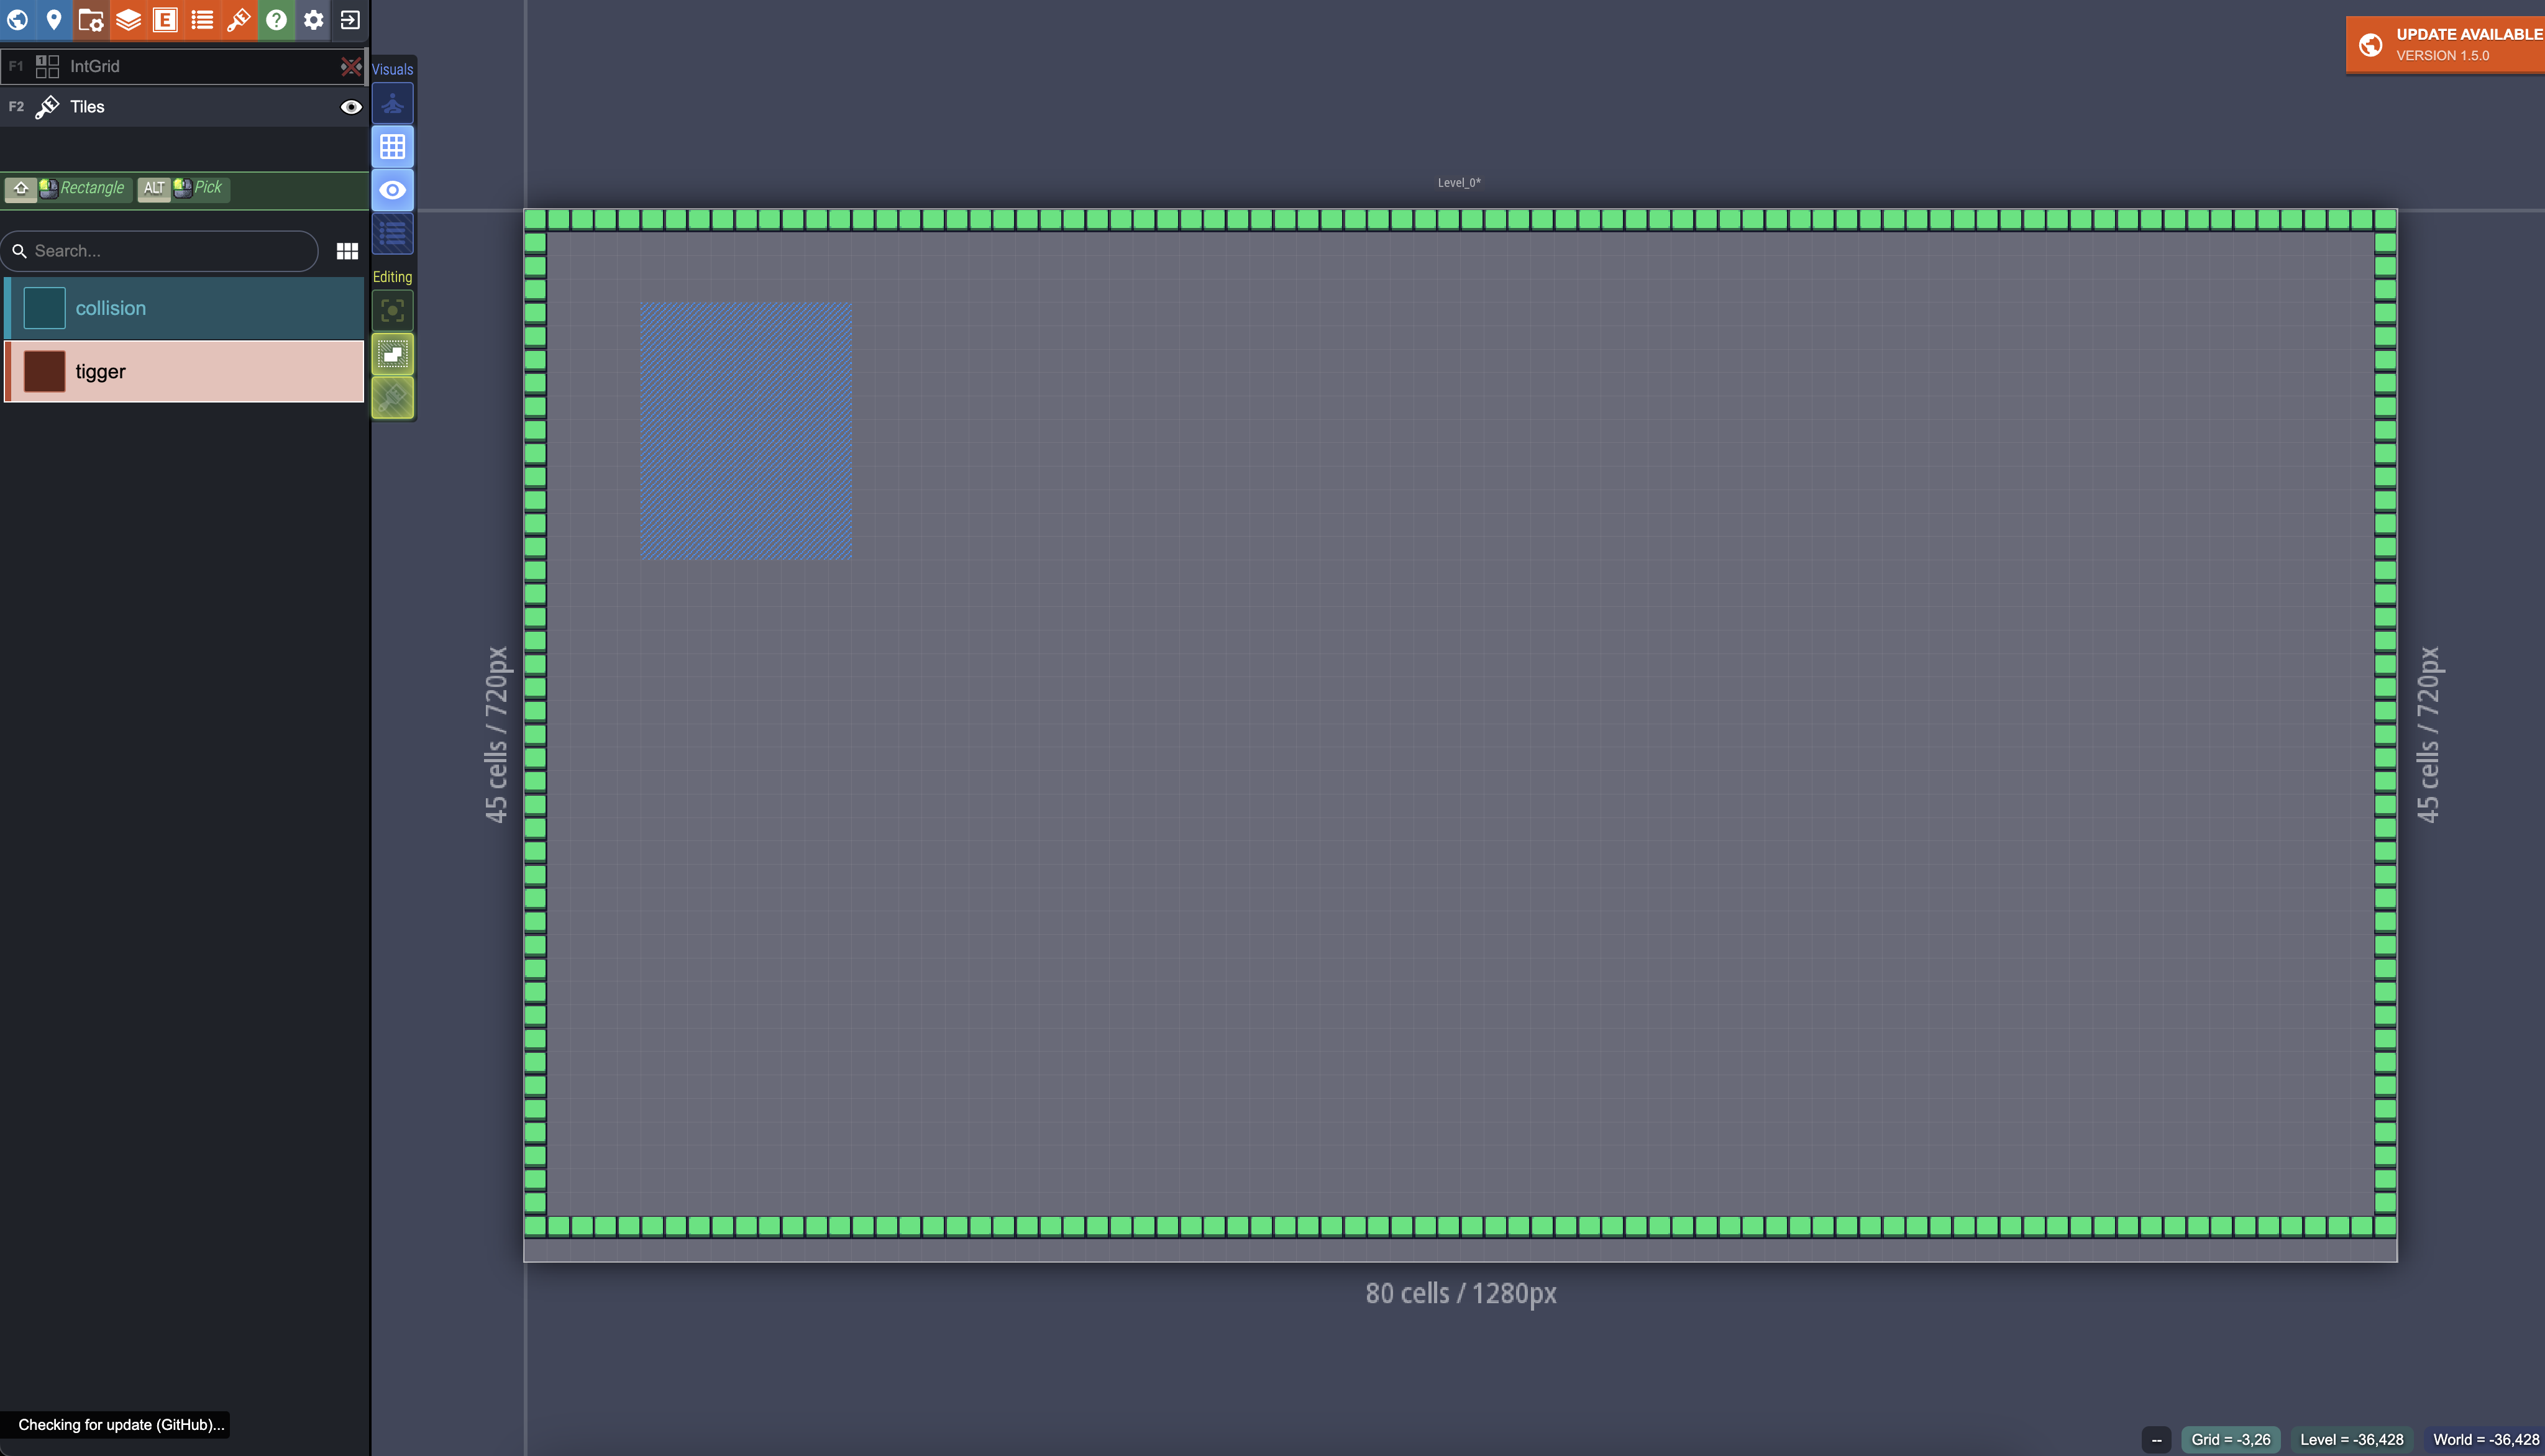
LDtk has an option they call “Super Simple Export” which allows you to export your levels in a simpler manner when starting to work in a new engine. This export creates a folder per level, and in each folder is a composite PNG of the entire level, PNG’s for each layer, a IntGrid CSV and a data.json file. For this test I only had 2 layers in my level; the tile layer and an IntGrid layer to define collision tiles and the encounter areas.
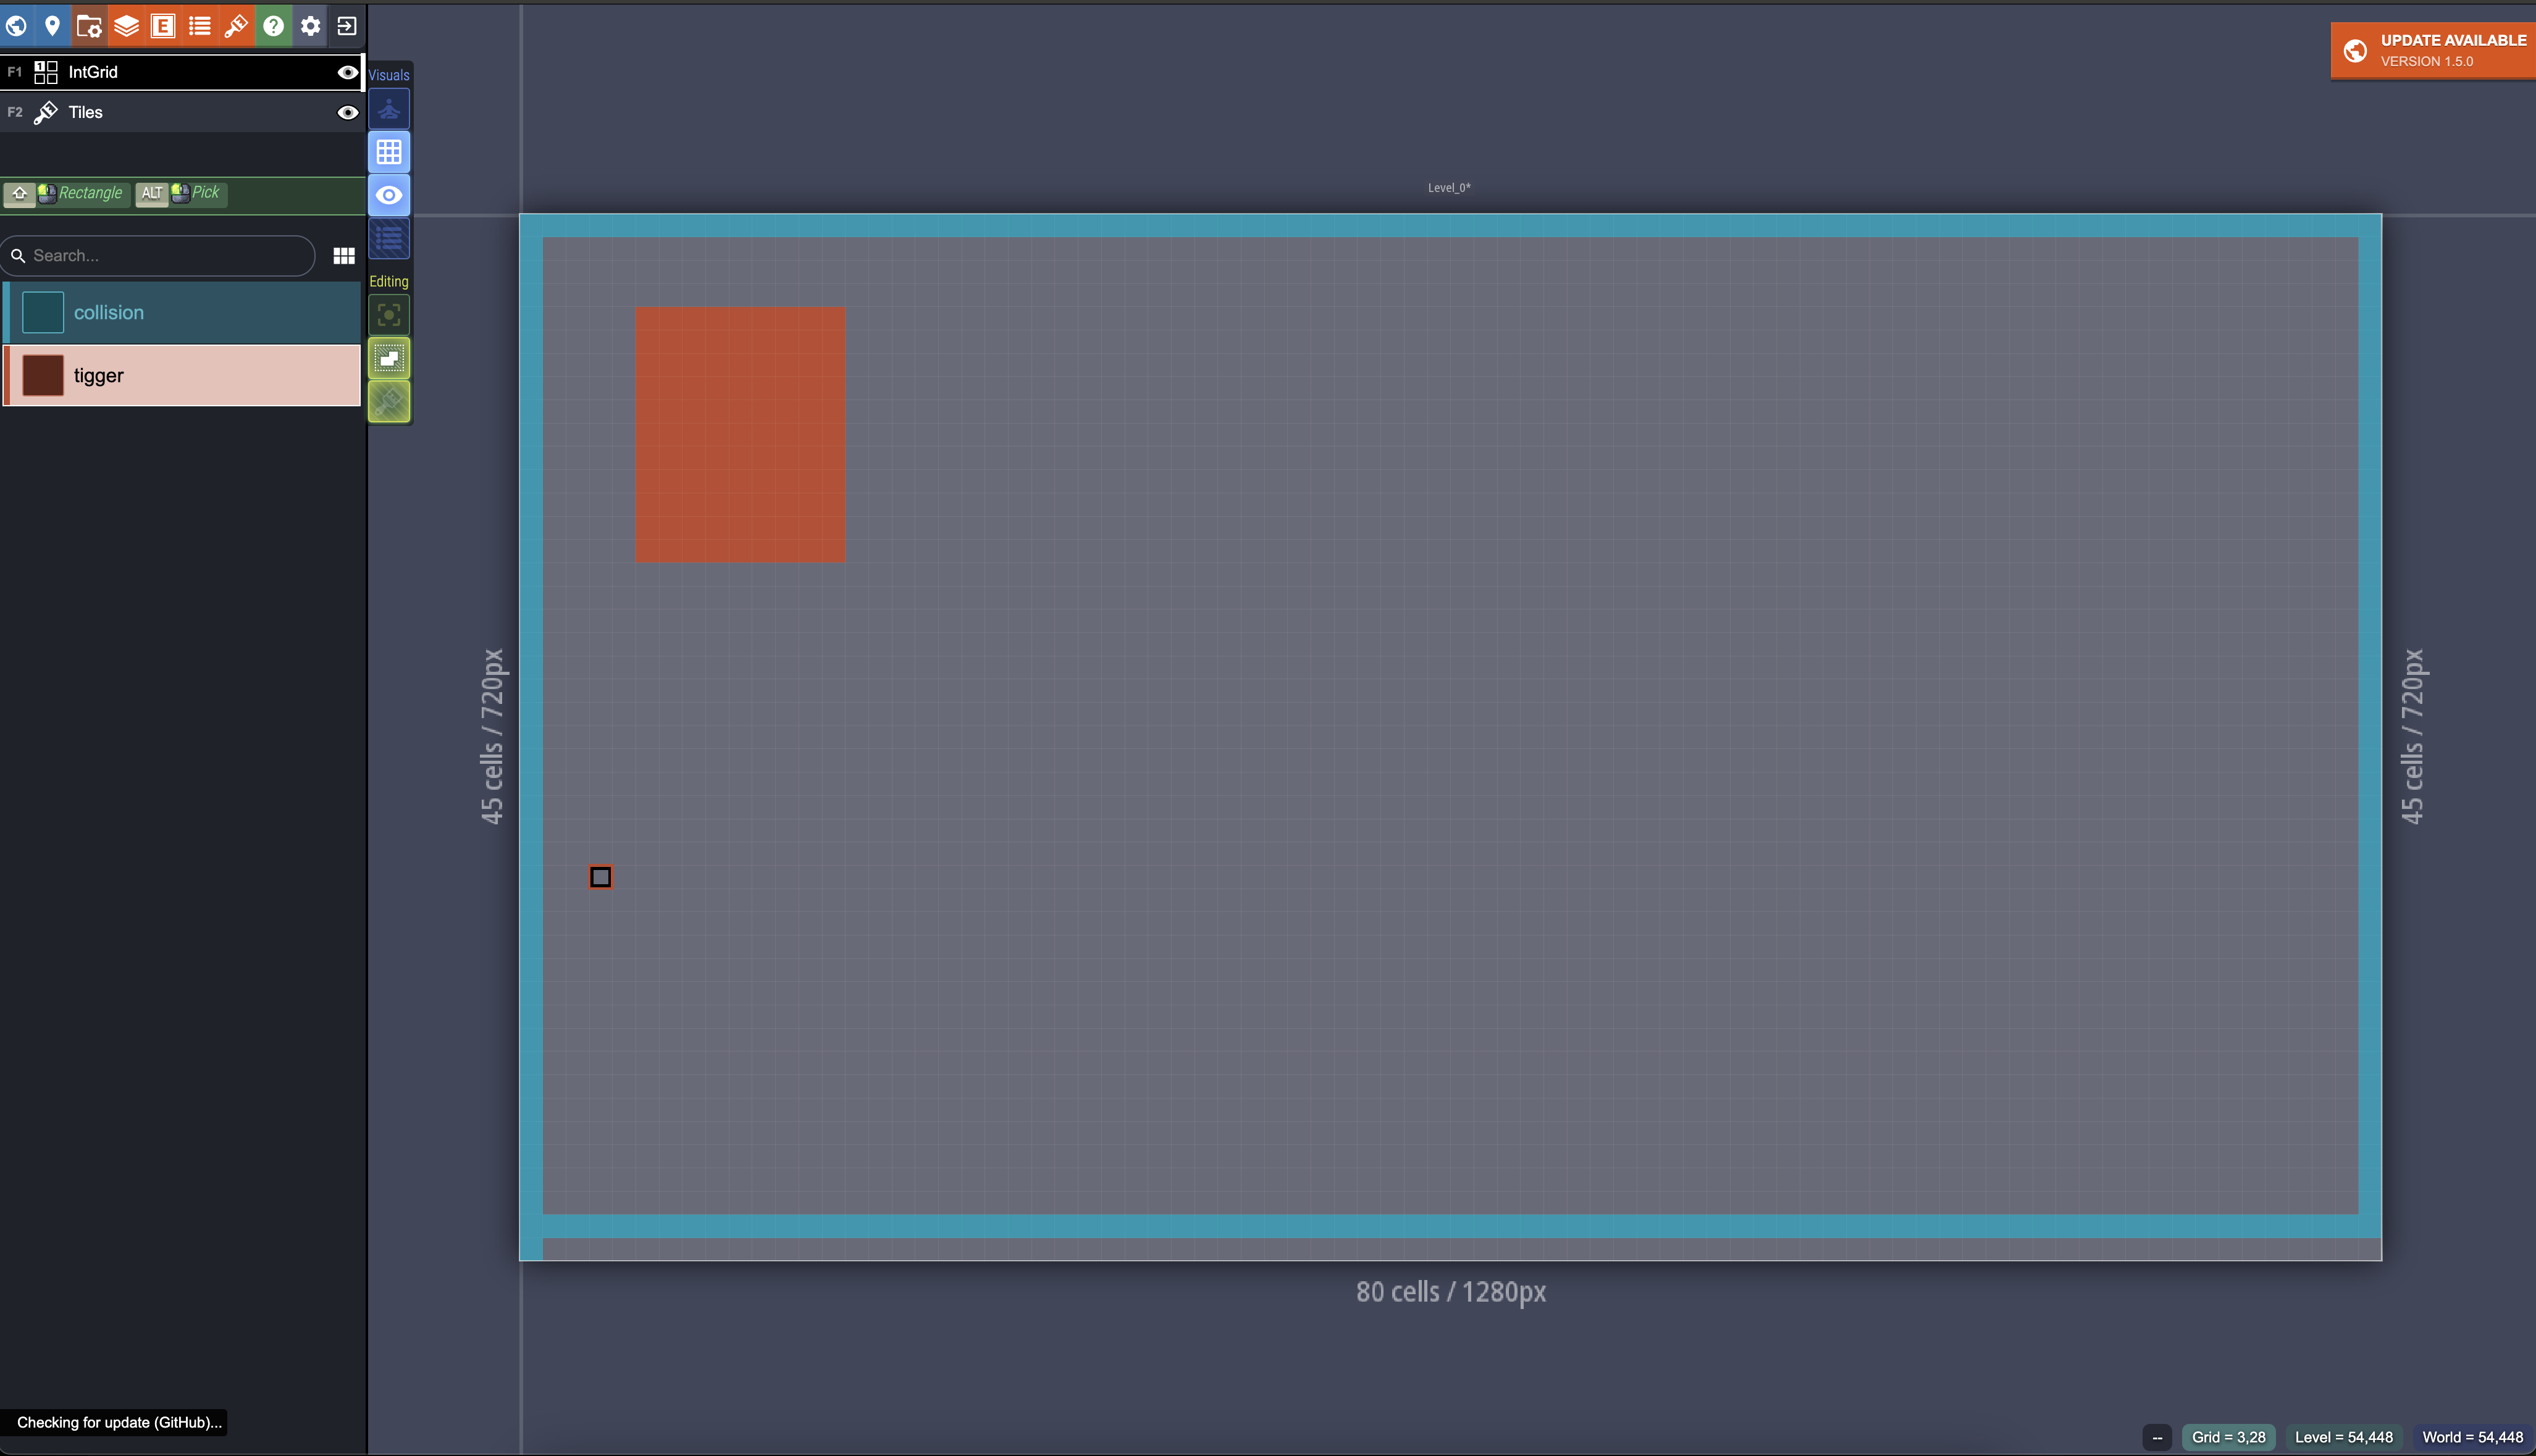
Here is my IntGrid Layer. Blue color for collisions and orange for the Encounter Trigger.
Now that I had the composite image and the IntGrid.csv it was time to try and render these in DragonRuby. This process was really straightforward. Rendering the composite image was as simple as:
args.outputs[:scene].sprites << [
  0,
  0,
  args.state.world.w,
  args.state.world.h,
  level_image
 ]
We just add a sprite to the sprites array, setting it’s x and y to 0,0 (bottom left in DragunRuby), give it a width and height (in this case the same size as our window), and pass along the png image file path and that’s it. We just rendered the “map”. Next I needed to get collisions setup so my player couldn’t run off the map. For this we use the IntGrid.csv.
When I started dabbling with DragonRuby I started with a basic example from one of the included samples that came with the engine. In this sample you create a map from an array of arrays containing integers. These arrays of integers act as rows and columns:
args.state.area = [
    [1, 1, 1, 1, 1, 1, 1, 1, 1, 1, 1, 1, 1, 1, 1, 1,],
    [1, 1, 0, 0, 0, 0, 0, 0, 0, 0, 0, 0, 0, 0, 1, 1,],
    [1, 1, 0, 0, 0, 2, 0, 0, 0, 0, 0, 0, 0, 0, 1, 1,],
    [1, 1, 0, 0, 0, 0, 0, 0, 0, 0, 0, 0, 0, 0, 1, 1,],
    [1, 1, 0, 0, 0, 0, 0, 0, 0, 0, 0, 0, 0, 0, 1, 1,],
    [1, 1, 0, 0, 0, 0, 0, 0, 0, 0, 0, 0, 0, 0, 1, 1,],
    [1, 1, 0, 0, 0, 0, 0, 0, 0, 0, 0, 0, 0, 0, 1, 1,],
    [1, 1, 1, 1, 1, 1, 1, 1, 1, 1, 1, 1, 1, 1, 1, 1,],
    [1, 1, 1, 1, 1, 1, 1, 1, 1, 1, 1, 1, 1, 1, 1, 1 ],
  ].reverse
This can be read as a map thats 16 columns wide and 9 rows high. The integers within these arrays are then used to create tiles (or not) to display depending on which integer each cell contains. In the example from DragonRuby cells whose integer was 1 would get a tile created and added to args.state.walls, cells whose integer was 0 would simply be empty space, and cells whose integer was 2 would get a tile created and added to args.state.goal.
The exmaple code then added a touch of intersect_rect?logic to detect player collisions with any object in args.state.walls and stopped movement. As well as doing the same collision detection for args.state.goal but this time displaying some text on the screen to indicate a goal was reached.
Then I realized the similarities between this area code and the IntGrid from LDtk
Once I had exported my level from LDtk and started poking around the files something struck me. The IntGrid.csv was the same sort of data that the exmaple was using to build its map. So I loaded in the csv data, generated the same array of arrays structure and voila!
area = []
 int_grid = args.gtk.read_file(intgrid)
 int_grid.each_line do |line|
   s = line.chomp(',')
   string_array = s.split(',')
   area << string_array
 end

 args.state.area = area.reverse

args.state.area.map_2d do |y, x, v|
   if    v.to_i == 1
     args.state.walls << tile(args, x, y, 0, 255, 0) # green tile
   elsif v.to_i == 2
     args.state.goal << tile(args, x, y, 0, 0, 0) # black tile
   end
 end
Now I had a method to render the actual image of the map to the screen, and another method to handle building the walls and goal (in this case, the goal went from a single cell to an area) and adding them into the state for me to use for checking collisions.
I’ve now utilized a real level built in LDtk and rendered via code. Some might now think this is a big deal especially if you’ve had experience with game dev but for me this was the first time I’ve done any sort of rendering of levels and handling of collisions via purely code and not with a built in tilemap editor or GUI for building levels.
The last thing I did was add a camera to follow the player. This was pretty straightforward as well and DragonRuby had an example for a simple camera which was eash enough to copy paste into my existing code to get it all up and running.
devlog, dragonruby, gamedev — Jan 10, 2024